Part 1: Validate your IP Address on the 'My Account' panel
Part 2: Change your Android DNS settings
Before you start: Please write down your current DNS addresses before you change your DNS configurations. You should take note of these addresses in case that you need to get back to your original settings. If your original configuration were set to “Automatic”, just change your DNS settings back to “Automatic” in order to get back to your original settings.
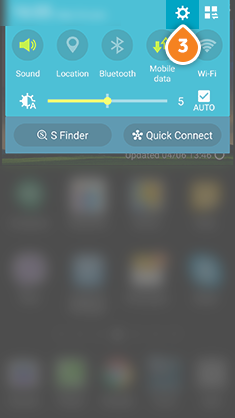
1. Go to “Settings” (3)
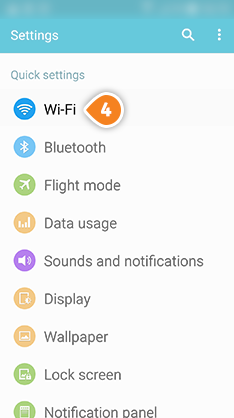
2. Select “Wi-Fi” (4).
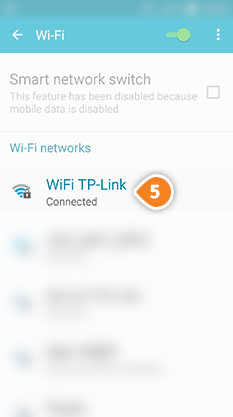
3. Press and hold your network (5) until dialog pops up
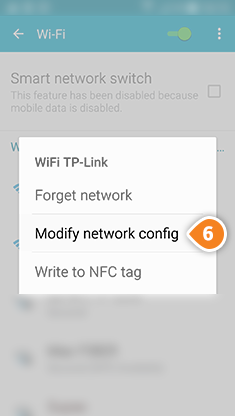
4. Press on “Modify network config.” (6)
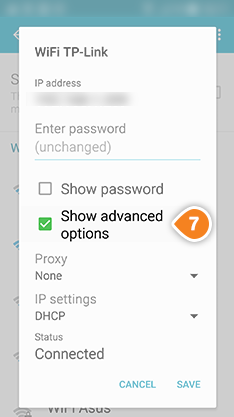
5. Check “Show advanced options” (7)
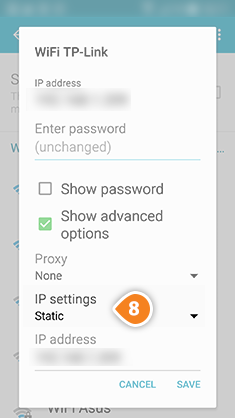
6. Select “Static” (8) for “IP settings”
7. In the “DNS 1” and “DNS 2” fields (9) enter the Keenow DNS addresses.
Preferred DNS Server: 62.210.122.43
Alternate DNS Server: 157.55.83.218
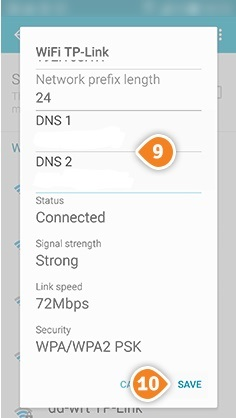
8.Press “Save” (10)
9. Restart your device