Setup Keenow VPN on Chromebook (Chrome OS or Chromium OS) using the native L2TP/IPsec VPN client:
1. Log-in to your Chromebook.
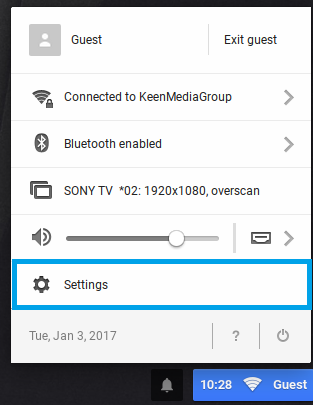
2. Click the status bar, this can be found at the bottom right of your desktop screen and choose “Settings”.
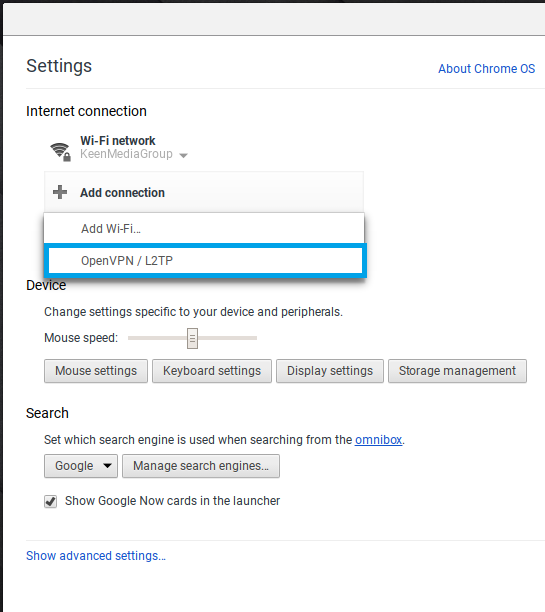
3. Under the “Internet Connection” section, click on “Add Connection” and then choose “OpenVPN/L2TP”.
4. A new window will pop up, fill the fields with the following settings:
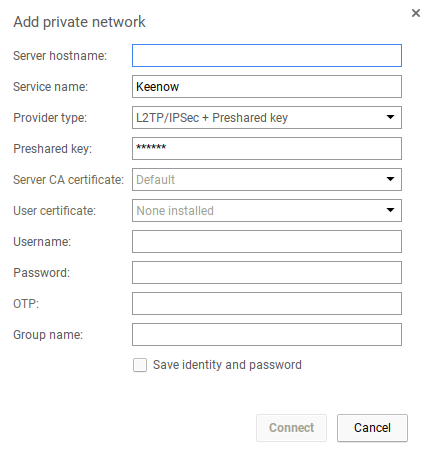
• “Server Hostname” – Enter the L2TP Server IP. You can find a list of L2TP/IPSec-supported VPN servers on the
Downloads section.
• “Service name” – Enter Keenow (or any other name you really like)
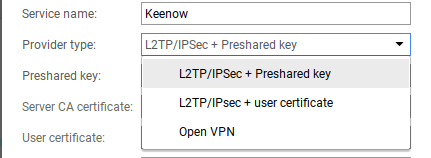
• “Provider type” – Choose "L2TP/IPSec + Preshared key".
• “Pre-shared key” – Type "secret" (without the quotes)
• You have received your dedicated VPN credentials by email (not the client area or app login) - you can also find them on the
Client Area (listed under your Active premium service)
• “Username” – type your VPN username.
• “Password” – Type your VPN password.
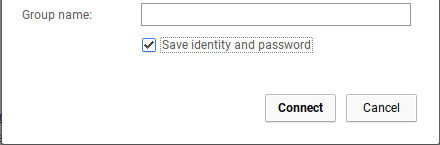
5. Click on “Save identity and password” and hit Connect
6. That’s it! You’re now set, To verify that you are connected to a VPN server, please go to
whatismyipaddress.com and check whether your IP address and location have changed.