Part 1: Validate your IP Address on the 'My Account' panel
Part 2: Change your Playstation 3 settings
Before you start: Please write down your current DNS addresses before you change your DNS configurations. You should take note of these addresses in case that you need to get back to your original settings. If your original configuration were set to “Automatic”, just change your DNS settings back to “Automatic” in order to get back to your original settings.
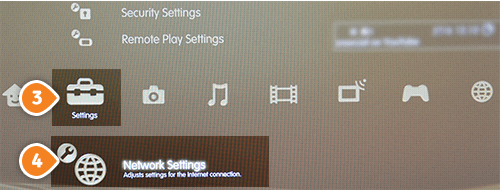
1. Go to “Settings” (3) then select “Network Settings” (4)
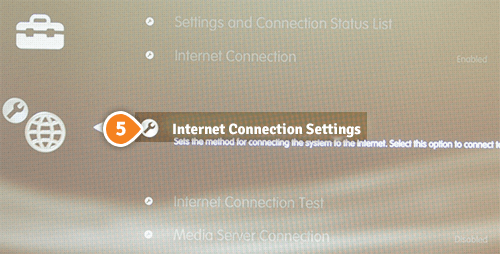
2. Choose “Internet Connection Settings” (5). Choose “Yes” once confirmation screen is displaying that you will be disconnected from the Internet.
3. Choose “Custom” (6) in “Select a setting method” compartment

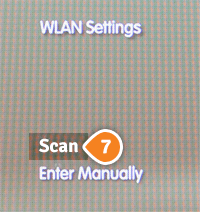
4. Select “Scan” (7) in “WLAN Settings” compartment
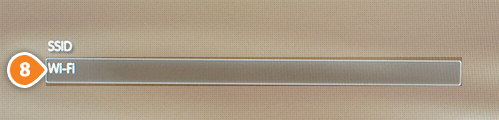
5. Choose your network then select “Wi-Fi” (8)
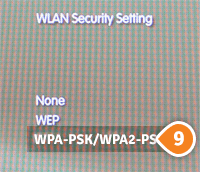
6. Select your Wi-Fi network. Select “WPA-PSK/ WPA2-PSK” (9)
7. Enter your WPA key (10).

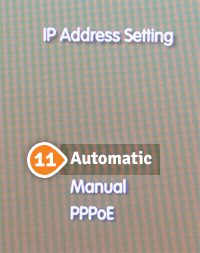
8. Choose “Automatic” (11) in the “IP Address Settings”.
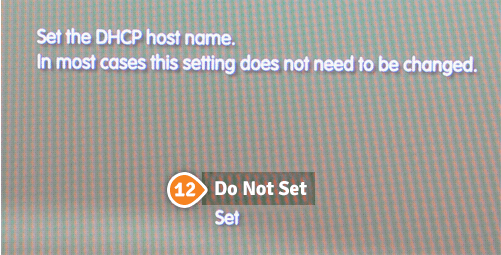
9. Select “Do Not Set” (12) for “Set the DHCP host name”.
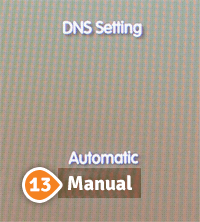
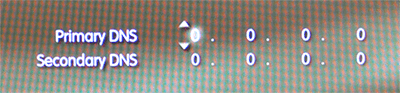
10. Select “Manual” (13) in “DNS Settings”.
11. Enter the Keenow Addresses:
Primary DNS Server: 62.210.122.43
Secondary DNS Server: 157.55.83.218
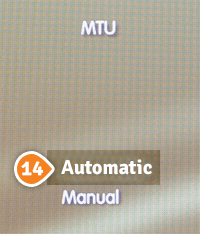
12. In “MTU” choose “Automatic” (14).
13. Select “Do Not Use” (15) in “Proxy Server” compartment.

14. Select “Enable” (16) in UPnP”.

15. Press the “X” button to save settings.
16. Restart your PS3 and you are done.