Setup Keenow VPN on OpenWrt Routers using the native OpenVPN feature:
1. Download the OpenVPN configuration files (UDP or TCP) from the
Downloads area, unzip them, and write down the server IP address and protocol you want to connect to.
2. Connect to your router. To do that you have to enter the following address in your browser: http://192.168.1.1.
Also, if you are connected to your router via Ethernet, set your network connection to obtain the IP address automatically.
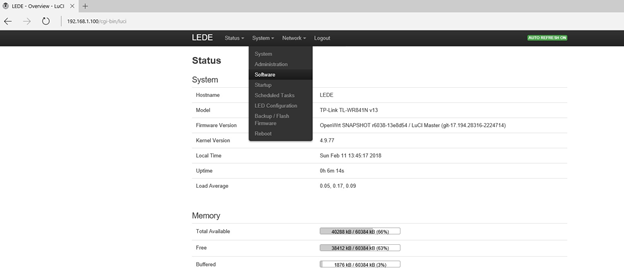
3. Install OpenVPN (you need internet connection on the OpenWrt Router). Go to System > Software, and open the Available Packages tab. Then install:
Luci-app-openvpn

And openvpn-openssl

4. You'll now need to fill the “CA Cert” field on the same page. Go back to the unzipped OpenVPN directory from step 1 above. View the OpenVPN config file (with the extension .ovpn) of the server you need to connect to using Notepad or a similar text viewer. For instance, if you want to connect to our Israel server using the UDP protocol, you have to view the Israel 193.182.144.165- UDP.ovpn file.
5. Find the lines that begin with “<ca>”
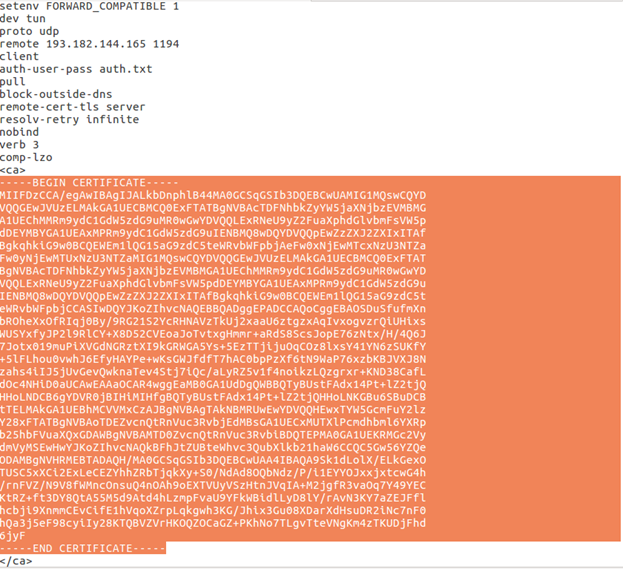
6. Copy the text you see inside the <ca> and </ca> tags and paste it to the New File “ca.crt” for example.
7. Login as root to the router via SSH using Terminal and create “/etc/openvpn/userpass.txt”. Enter your VPN Username and VPN Password on the first line and the second line respectively and save it. You can check it in your Keenow account page.
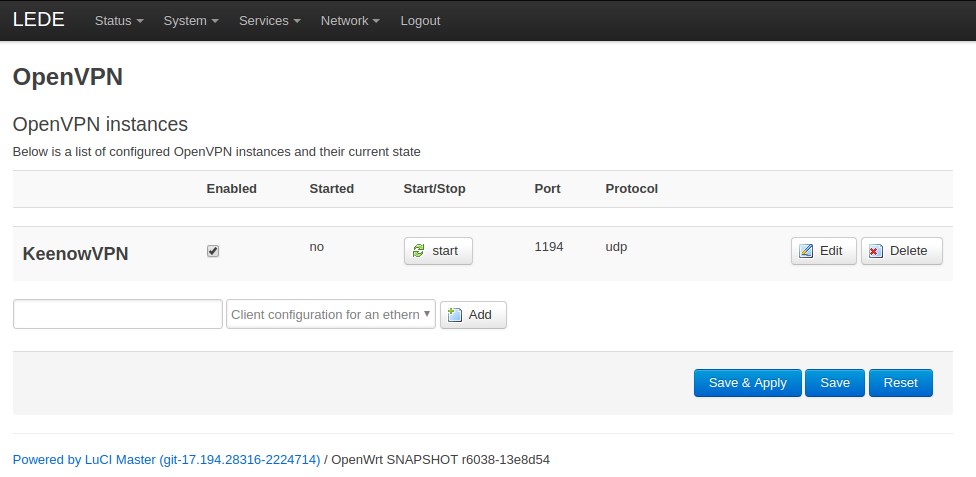
8. Navigate to Services > OpenVPN. Create a new VPN client : Client configuration for a routed multi-client VPN > ADD.
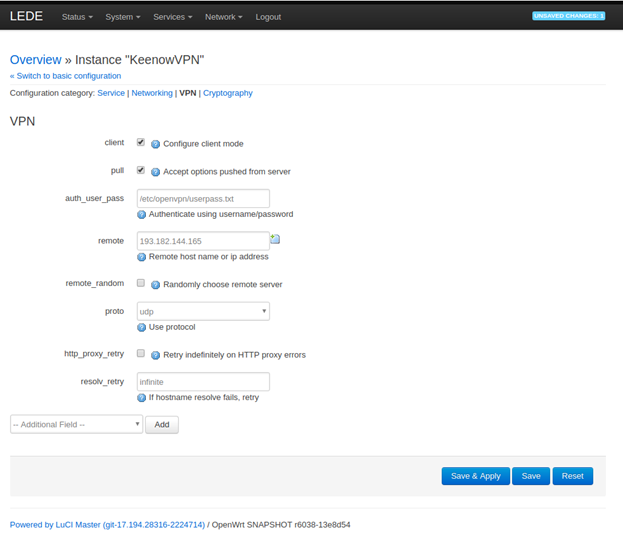
9. Now return to OpenVPN tab choose you VPN connection, Click on “Switch to advanced configuration” and Fill the fields and check the radio buttons with the following settings:
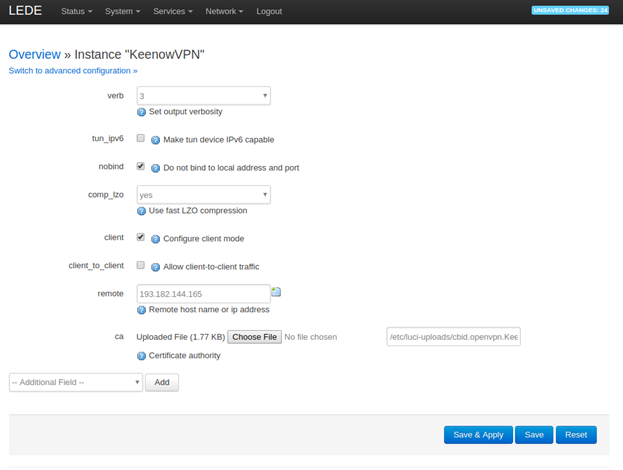
Set “remote” to Keenow server ip with you want to use. Then click
Add button and choose CA then choose your ca.crt file from step 6.
10. Click on “Switch to advanced configuration” and go to VPN tab and add filed “auth_user_pass” and set path to you “userpass.txt” from step 7
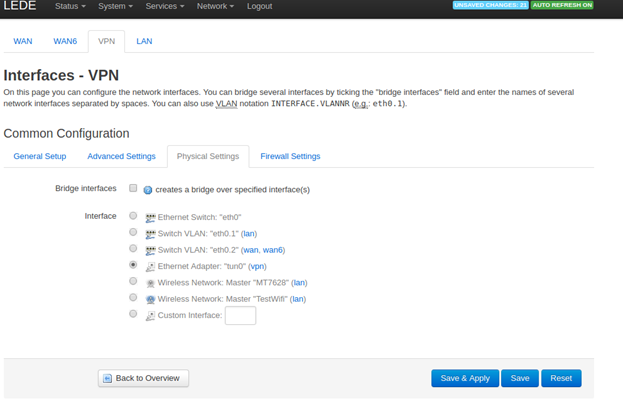
11. Navigate to Network > Interfaces Click on Add New Interface. Enter the details as below:
Name of the new interface: VPN
Protocol of the new interface: select Unmanaged from the drop down menu
Cover the following interface: Custom Interface - tun0
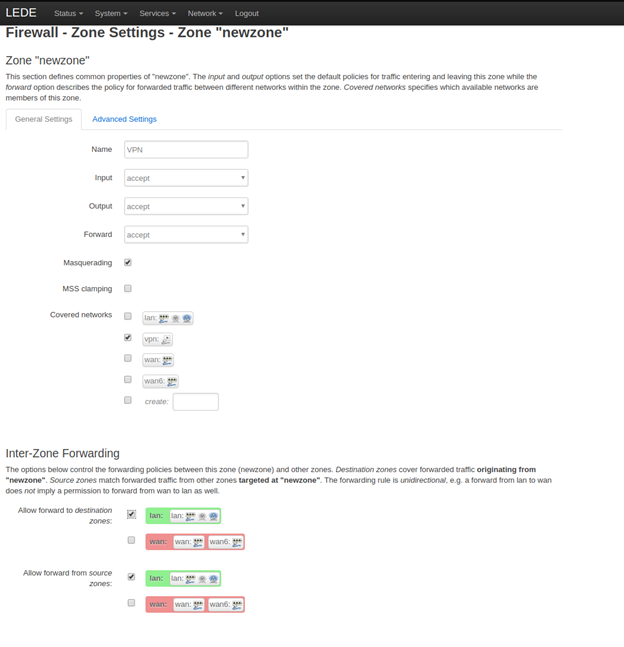
12. Navigate to Network > Firewall Click on Add New zone. Enter the details as below:
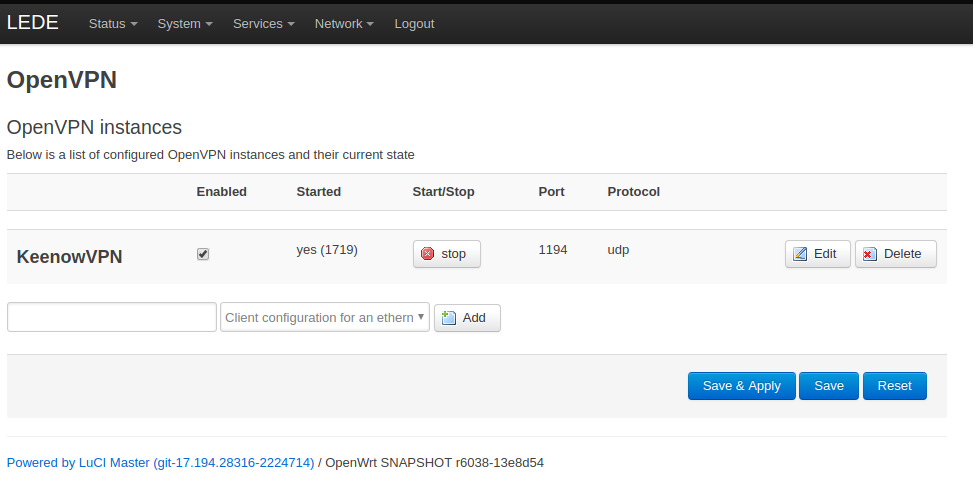
13. Now you can return to OpenVPN tab and start new VPN service with
Start/Stop button
14. The connection is now created and ready to use. To verify that you are connected to a VPN server, please go to
whatismyipaddress.com and check whether your IP address and location have changed.